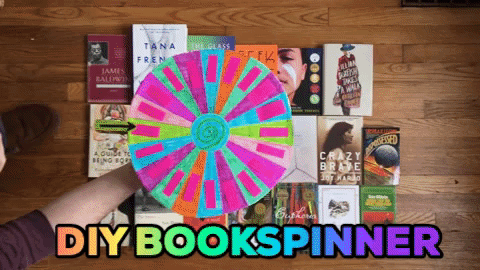
Make a Bookspinner and Never Have to Make a Decision Ever Again
Maybe you’re not at all like us and you have no problem going through your life making confident decisions like what you want on your pizza or which La Croix flavor to buy or which of the 100 or so unread books you own you should read next. If you are, however, Becca has invented a fun DIY that will not only kill some time during your quarantine, but also remove the need for you to ever make another reading related decision.
The wheel weaves as the Wheel wills.
Materials

This DIY was created using stuff we found around our houses. Becca used a paperclip to hold her arrow and for the spinner to spin around, while I used a small finishing nail. There will be a lot of freedom to experiment here. But your junk drawers almost definitely have useful items for this project. Get creative with it.
I used:
a 12” square piece of cardboard (plus extra scrap cardboard)
plain white paper
a small finishing nail
a popsicle stick
string
pencil and markers
a thumbtack
a ruler
scissors
X-Acto Knife/box cutter (optional)
packing tape
hot glue (gun)
a protractor (I used this app on my phone)
Instructions
(or maybe more like, here’s how I did it, but you can probably do this more efficiently.)
Measure your cardboard square and mark the center. My square was 12” so at 6” on the side and bottom I drew lines through to intersect at the center of the cardboard.
At this point you could trace something circular, or use a compass to create the circle shape of your spinner board. Or you could also do the much less precise thing that I did and create a cheap compass by tying a length of string to a pencil and a thumbtack and then drawing a badly shaped circle on to your cardboard like so:
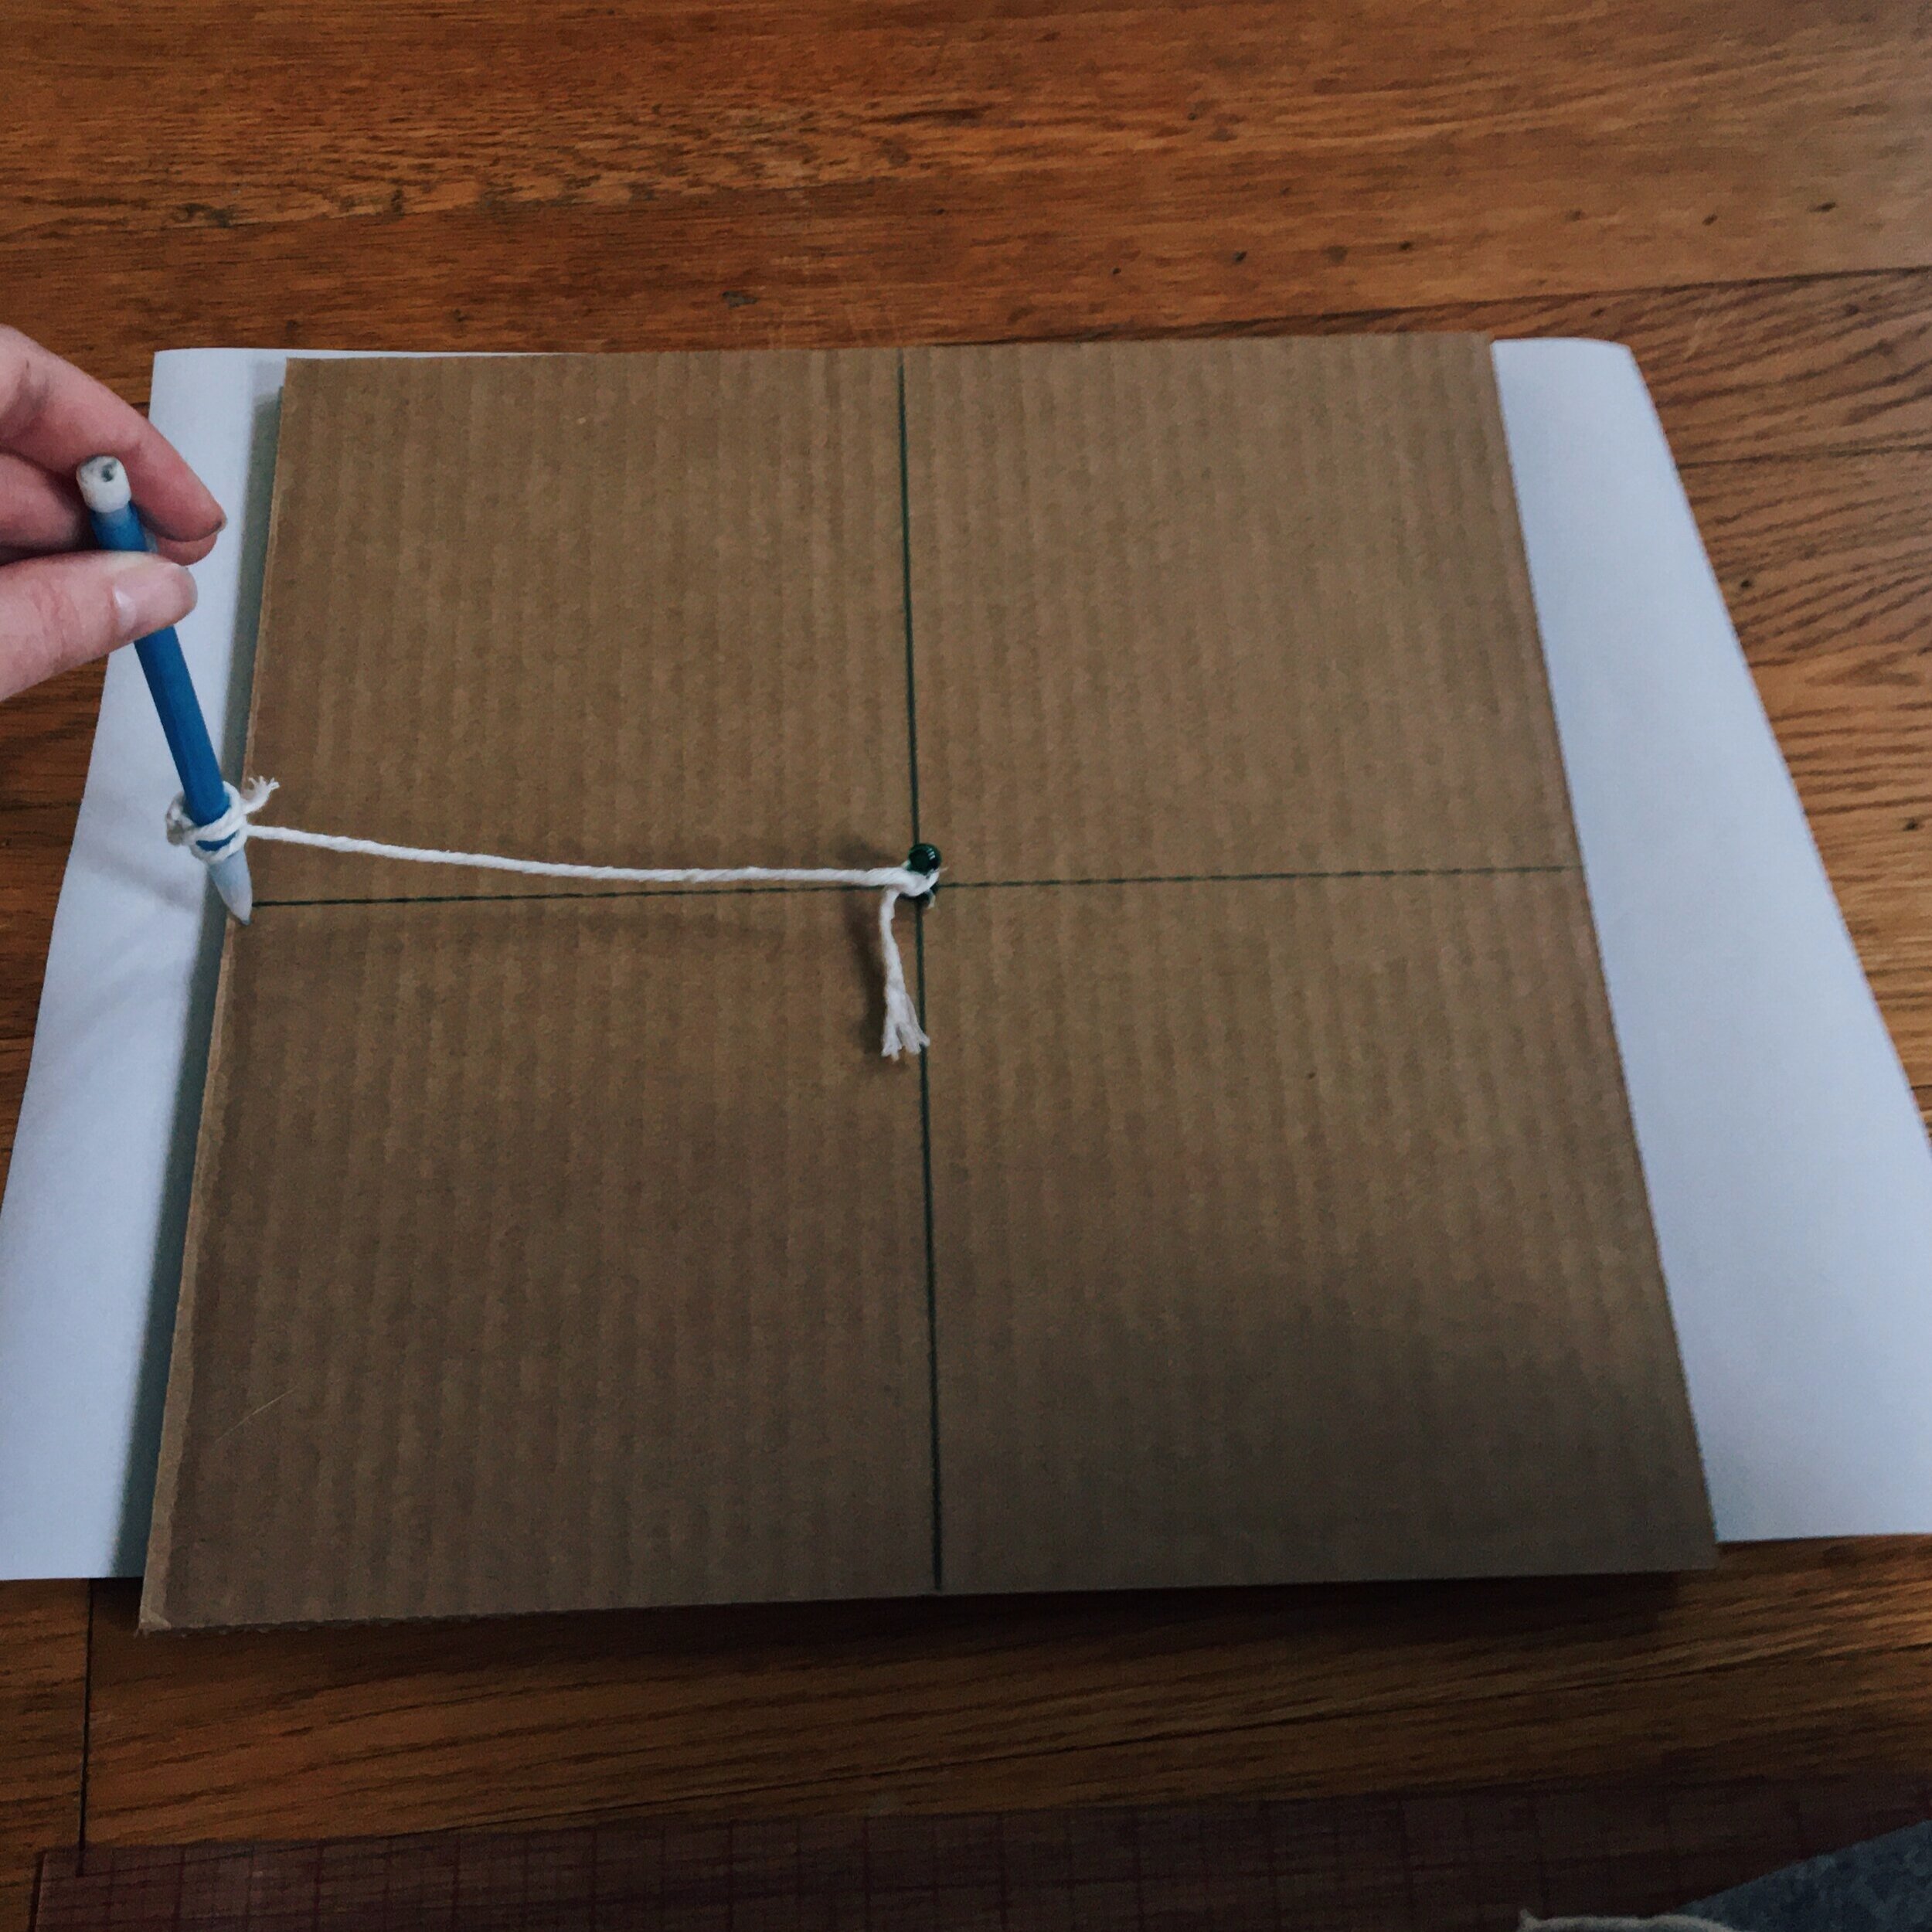
Make a bad compass and draw a lumpy circle.
3. Use scissors, X-Acto knife, or box cutter to cut along the circle lines you just drew.
OPTIONAL. At this point, depending on how you plan on “coloring” your spaces, you may want to attach a plain paper surface to your spinner circle before drawing on the lines.
4. Now it’s math time. Decide how many books you would like to use for your spinner. In order to figure out how many degrees you will need to draw each line at to create the sections on your spinner you will need to divide 360 (the number of degrees in a circle) by the number of spaces you would like on your spinner. We made ours with 20 spaces. The math for this works out to 360÷20=18. I then used a protractor (I used a protractor app that used my phone camera, so I had to set up my phone above my spinner. I did this by putting my phone on my coffee table, allowing the camera part to “hang” off of the edge while my spinner sat below it on the floor) lined up at the center mark of my circle and then drew lines out to the edges of the circle at 18 degree increments. It looked like this:

Using the Protractor App

Lines drawn on (after deciding to tape white paper on to the surface)
5. Now you may choose to differentiate your spaces. You could cut out differently colored pie slices of paper the same size as the spaces on your spinnern and then adhere them to the spinner with tape or glue. I did not have fancy-fun paper, so I colored my spaces in using 12 year old markers.

It looks… yeah, it looks great.
6. To make it spin, insert a small finishing nail into the center mark of your spinner. Because the nail is obviously much longer than the depth of the cardboard, make a small block by folding strip of cardboard about 1.5” wide by 8” long into a block shape that is roughly 1” tall. wrap the block in packing tape to keep it together. Poke the nail into the block. In order for the board to spin, this block should not be adhered to the spinner in any way. The block will also offer something stable to hold while spinning the board.
7. Create an arm for your spinner arrow by cutting a strip of cardboard about the width of a popsicle stick and long enough to reach a few inches beyond the edge of the spinner. Tape it to the back of the block using packing tape.
8. Create three folds in the end of the strip of cardboard, roughly half an inch in length, to make a small platform to adhere the spinner’s arrow. In my case, the arrow is an arrow drawn on a popsicle stick, but you could also cut an arrow out of cardboard. I used hot glue to hold the platform in place and to attach the arrow. This will probably make more sense when you look at the following photo.

The incredible engineering of the spinner arrow arm.
9. Choose which books you would like to use for the spinner and write the titles out on strips of Post-It notes.
10. Stick one book title to each space on your spinner board. You can also take this time to create a little circle to cover up any messiness at the center of your spinner. I opted for a swirly thing that may also hypnotize me.

Another view of my very clean hot glue work.

Spinner with titles and spinny center decoration.
11. Spin and get those backlist titles read!